Archive for the ‘Easter’ Category.

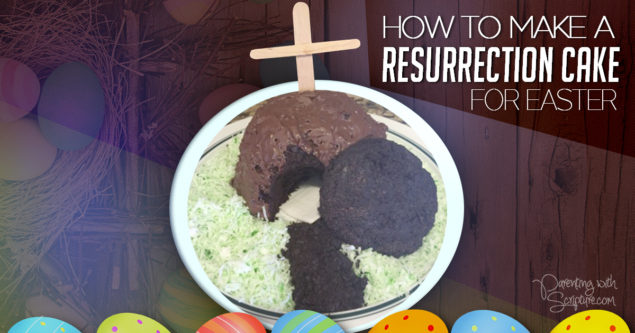
Resurrection Cake for Easter!

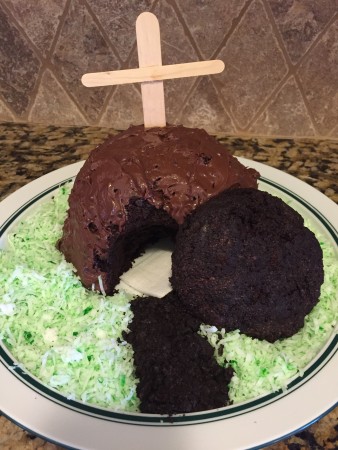
The minute I saw this link on Pinterest, I knew that I wanted to make it for our family’s Easter gathering.  I followed that link’s basic plan, but wanted to share my own tip and tweaks.  My 11 year old son, Jake, and I had fun making and assembling this the night before Easter.
IMG_1527
Supplies/Ingredients:
-8 C batter bowl (mine is Pampered Chef brand)
-Platter (about 12 inches) or cardboard cake round
-2 craft/popsicle sticks
-Chocolate cake mix
-Chocolate frosting (ours had mini-chocolate chips in it and we decided we liked the bumpy/rocky look of it)
-7 oz shredded sweetened coconut (or half a 14 oz bag)
-Green food coloring (optional, if you don’t toast the coconut)
-3-5 Oreos (or substitute crumbled cake…will explain below)
-white bandage or small strip of white cloth…even white copy paper or tissue paper could work

Instructions:
(Some of you may be able to look at the picture and intuitively know how to make this happen.  For those of you who like details, here ya’ go!)

Cave
-Pre-heat the oven per your cake mix instructions.
-Grease and flour 8 cup batter bowl all the way up to the top since the cake will rise.
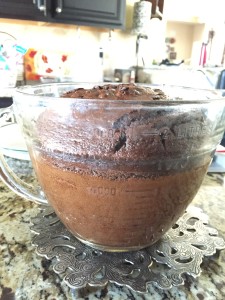
IMG_1511
-Make cake batter per recipe and pour into prepared batter bowl.
-Ours needed baking for 1 hour at 350 degrees to get it cooked all the way through.  This is quite a bit longer than the box mix calls for.  After the 40 minute mark, keep an eye on yours to see how it’s doing.  Insert a knife through the middle to check for doneness.
-Once baked, allow to cool before removing.  Run a knife down between the cake and the bowl to loosen it before inverting the bowl to get the cake on to the cooling rack.
-When the cake is cool, slice off the puffy part so that it will make a flat bottom for the cave.  ***Reserve the portion you cut off!
-Set the cake on the back half of the platter with the larger flat side down.  Carve out an opening in the front (see pictures).  Make sure you don’t go too close to the top or the roof will collapse.  ***Reserve the portion you cut out!!!
-Ice the cake, reserving a dollop of the frosting for making the stone.

Walkway
Make the walkway in front of the tomb (see completed pic) by smashing Oreo cookies in a ziplock or crumbling a small portion of the reserved cake.
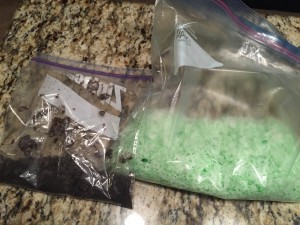
FullSizeRender

Stone
Make the big stone by crumbling the remaining reserved cake and mushing it by hand with the reserved icing.  (Fun, but messy part for kids!)  The consistency will be soft, but it needs to be firmly packed so that it will hold together.  Wrap this in plastic wrap or wax paper and put in the freezer for about an hour so that it can firm up.
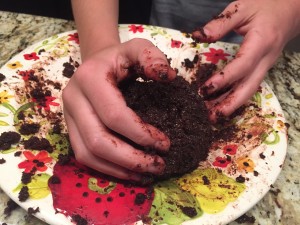
IMG_1512

Grass or terrain
There are a couple of options for this.  Shake the coconut in a ziplock with a few drops of green food coloring (see above pic).  Or, toast the coconut for a more natural, earth toned, terrain.  Spread around the cake and walkway.

Cross
I thought about real twigs, but that ooged out the germ freak in me.  So, we hot glued together 1 jumbo craft stick and 1 regular craft stick.  Make sure to put the cross beam high enough to account for part of the vertical beam being in the cake.
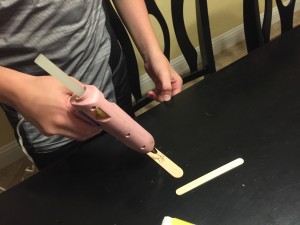
IMG_1517

Burial cloth
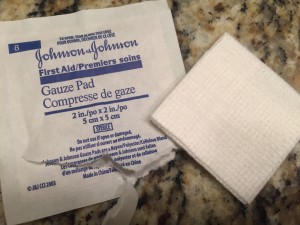
Lay whatever you are using to represent this inside the hole in the cave tomb.  We used this guaze, but any small strip of white cloth (got an old t-shirt?), tissue, or tissue paper would work.
FullSizeRender (1)
While it’s baking or while everyone is enjoying munching on your creation, consider reading the Resurrection Story from the Bible, Matthew 28:1-10.  This is a great way to create a teachable moment out of a fun, hands-on family project for a most important holiday!

For more teachable moment ideas, use Parenting with Scripture: A Topical Idea for Teachable Moments.


Comments Off on Resurrection Cake for Easter!   Posted In:     |    Written By: Kara Durbin
read more>>  

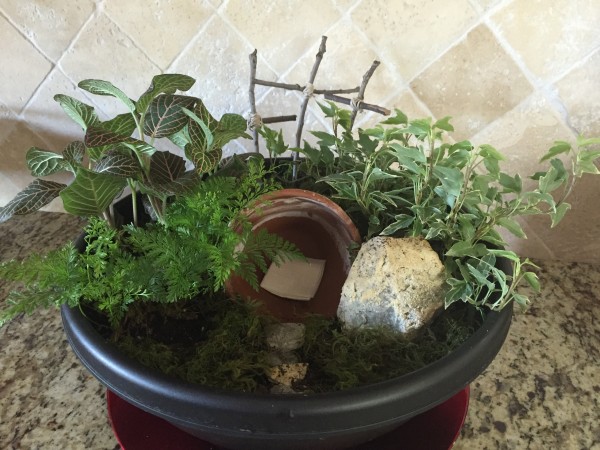
Resurrection Garden How-to for Easter Season

I’ve seen many different versions of Resurrection Gardens through the years and had always wanted to make one.  Being a Type A person, I finally put it on my calendar for the following February to make sure we remembered to not let another year pass.  With my kids getting older, I’m realizing more and more how few years left we have to do such things together!

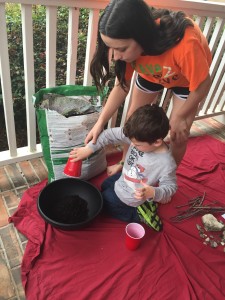
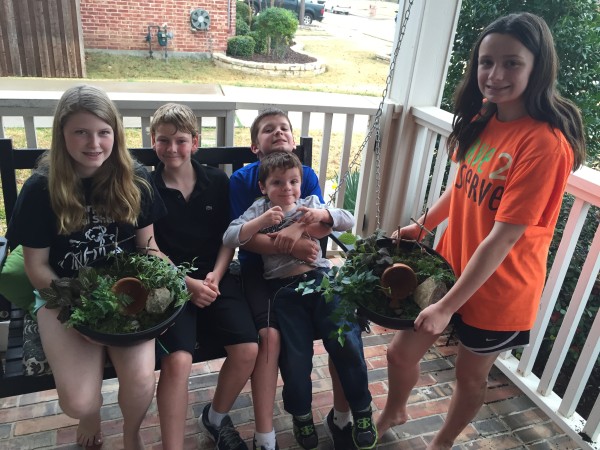
We had 3 other kids staying with us the weekend we did the project.  So, I can say that this was a doable and fun project for 4 years old through 8th grade!  I browsed through Pinterest at the variety of Resurrection Gardens to find my favorite design and followed the basic steps here.  However, I’d like to share my tips and tweaks of how we got our finished product.
IMG_1562

We divided the process over a couple of days as we had time and so it wouldn’t be overwhelming.

Garden Center
First, we headed out to the Garden Center to gather these supplies:
-shallow, wide container (we went with plastic so it wouldn’t be heavy)
-potting soil
-3 plants for whatever lighting will work for where you are keeping the garden.  The kids enjoyed making the selections.
-moss (I actually had the fake version from the craft store on hand.)
-twine (Or use any string your have on hand for putting the cross together. Hot glue is another option.)
-small pot to use as tomb.  You can buy a clay one like I used.  But, I actually recommend using one of the round containers that the plants you purchase for this come in.   Here’s why…After a couple of weeks, the pot started growing something white.
IMG_1541

Sticks and Stones Hunt
We have a city park/greenbelt behind our house and had a fun time foraging there for…
*1 large stone…needs to be approximately the size of the opening of the pot you are using for the tomb
*Several small stones…to use as a walkway, simply for added interest
*3 long sticks…make sure you account for the fact that part of them will be submerged in the soil.
*3 shorter sticks…for the cross bar

Assembling
*Spread out all your supplies in your work space.  The temperature was nice outside, but a bit drizzly so we worked on our covered patio.
*Scoop dirt out of the potting soil bag to fill your large, shallow pot.
IMG_1256
*Before taking the plants out of their pots, arrange everything as you wish the scene to look.
*Plant the plants.
*Cover the top of the tomb and any exposed dirt with the moss.
*Wipe any loose dirt out of the tomb and off the walkway rocks.
*Use the twine or string to put the cross bar on the cross.  Remember to put the cross bar high enough to account for the bottom part of the cross being stuck in the dirt.  To attach the cross bar, simply wrap the twine around several times diagonally both ways and then tie it off in the back.  Little hands will need help with this.
*Put a bandage or tissue in the tomb for the effect of the burial cloth.
IMG_1270
Once it’s completed, set the creation in the middle of the kitchen table (before moving it to its final destination) and enjoy a snack around it while reading the Resurrection story from Matthew 28:1-10.

Looking for more teachable moments?  Check out my book, Parenting with Scripture: A Topical Guide for Teachable Moments. 

resurrectiongarden


Comments Off on Resurrection Garden How-to for Easter Season   Posted In:     |    Written By: Kara Durbin
read more>>  

How to grow your own butterflies to teach that Jesus brings new life!

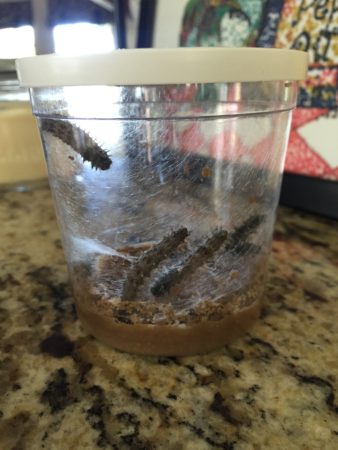
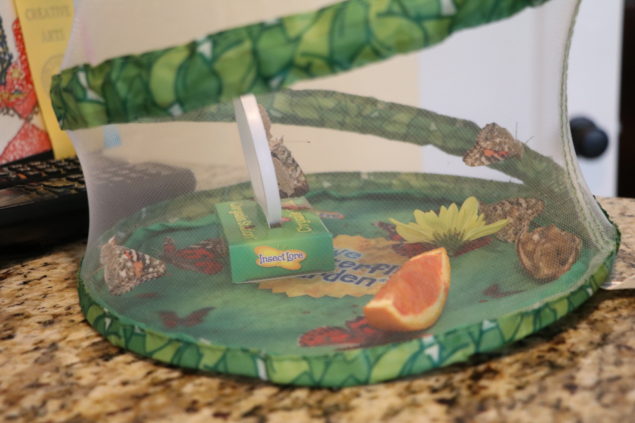
Ever since my kids did this in their Kindergarten class, I’ve been itching to do it at home.  Last year, with a tween and a teen, I decided it was now or never!  Though they are probably too cool to admit it, we all enjoyed the process.   Click on the picture to order the same kit we used.  Inside is a voucher for ordering the caterpillars.

cat-butterfly

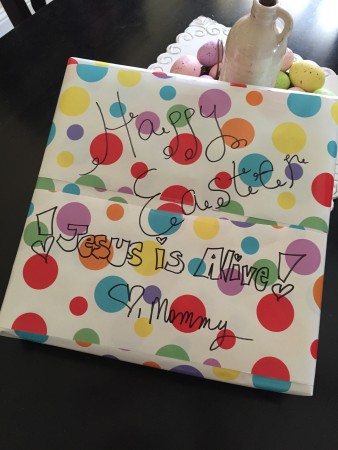
I’m posting this now in case you want to do this as a Lenten learning activity with your family.  Lent begins on March 1 this year.  You still have time to order this and have it wrapped up and ready to surprise them.  Or, you could save it for an Easter present as we did.  If you plan to wrap it up, make sure you order the box that does NOT have the live caterpillars included.  (Note:  I noticed some cheaper options as I was linking the product, but they all seem to ship immediately WITH the live caterpillars.)

IMG_1510

(…and this is why I need to remember to NOT buy wrapping paper with white background.
I had to double wrap it awkwardly with the leftover paper to keep it being see-through!)

I will only show the start and finish, so you can discover the other phases on your own.  It truly is a way to worship God through miracles of just one of His many creations!

caterpillars

butterflies

For those of you with little bitties (and really any age!), simply use this home project as a springboard for talking a God, the creator, and how amazing He is!

For those with kiddos old enough to think more abstractly, the analogy of the caterpillar to butterfly is a creative way to talk about the idea of Salvation.

Therefore, if anyone is in Christ, he is a new creation;
old things have passed away; behold, all things have become new.
2 Corinthians 5:17

As Salvation is foundational for our Christian beliefs, I devoted 4 pages to it in my book rather than 2 pages as with the other 100 topics.   Reference pages 190-193 of Parenting with Scripture: A Topical Guide for Teachable Moments  for related Scriptures and more ideas on how to talk with your children about Salvation.

butterfliewnewlife


Comments Off on How to grow your own butterflies to teach that Jesus brings new life!   Posted In:     |    Written By: Kara Durbin
read more>>  

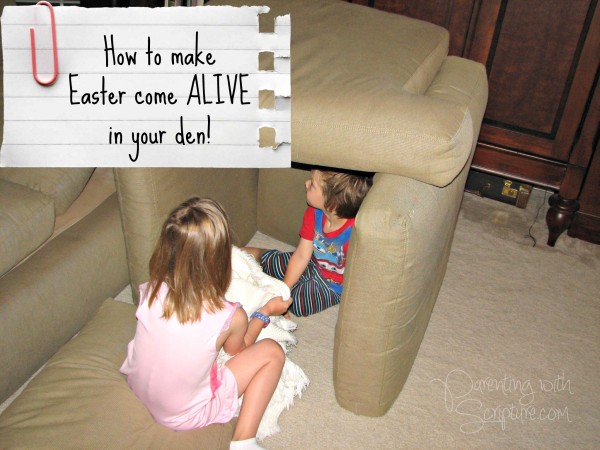
How to make the Easter story come ALIVE in your living room!

I am convinced that creating traditions for our families is one of the most important parts of parenting.  A church friend of mine started the tradition of acting out the Easter story in their den when their oldest, now 11, was still quite little.  Several years, 3 kids, and lots of treasured memories later, they are still at it.

How did this special tradition get started?  I’ll let her share…
We read aloud to our children quite a bit when they were young.  They enjoyed the Read Aloud Bible Stories by Ella Lindvall.  They would hear “A Sad Day and a Happy Day” from Volume 2 often.  They knew the sequence of Jesus dying for our sins and age appropriate details of his death.  We talked with them about the quiet weekend and then celebrating Jesus rising from the dead on Resurrection Day.  Also, we have always had a big box full of stuff that serves as props for pretend play.  It holds things like costumes, big pieces of fabric, sashes and hats.

One Easter weekend, Alisa was playing in her room and began to act out the story.  We encouraged it by bringing out couch cushions for the “tomb”.  As the children aged each year (and God brought us Hannah), they would act it out in more detail.  We did not anticipate that this would become a tradition.  All we did was read and talk about truths of the Bible.  I think kids will act out stories that they know and that’s what they did.”

Here’s a peek into the VanEerden living room from a couple of the years!

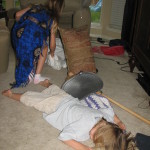
From 2009 – Left to Right
– Jesus being wrapped in cloth in the tomb
– Angel rolling the stone away
– Soldier fainted
– Nail scarred hands

Jwrapintomb8 an rolls st away10 soldier fainted 12 nail scarred hands


From 2012 – Left to Right Below
– Carrying the cross
– Jesus on the cross being pierced in the side
– Woman at the tomb, soldier fainted
– Happy JESUS IS ALIVE!!!

carrying crossPiercing sidesold out emptyHappy J alive


I’m willing to bet that these kids will carry on this tradition with their own children some day.  Don’t you think so?

What’s your favorite family Easter tradition?

Not sure about the true meaning of Easter?
Or, do you struggle in knowing how to explain the purpose of Easter to your children?
See the topic of “Salvation” in your copy of Parenting with Scripture: A Topical Guide for Teachable Moments.

How to make Easter come alive..


Comments Off on How to make the Easter story come ALIVE in your living room!   Posted In:     |    Written By: Kara Durbin
read more>>  

Holy Week- Jesus and Wii?

A friend of mine posted this on Facebook last year and gave me permission to share. 

This morning we talked about Holy week with my kids. My 6 year is notorious at tuning me out and especially if it has nothing to do with reptiles, Skylanders (a Wii game), or ninjas. My 8 year tried to clear it up by telling him that he had saved up and used his own $ to by my 6 year old a new Skylander and it was at Target. All the 6 year old had to do was go get it.  Mr. 8 year old added, “That’s how it is with Jesus, He already paid for our sins. All you have to do is accept it.”

accept: Consent to receive.

Truly I tell you, anyone who will not receive the kingdom of God like a little child will never enter it.  Luke 18:17

For a simple explanation of Salvation, see that topic under your copy of
Parenting with Scripture: A Topical Guide for Teachable Moments.
What a great week to discuss this topic with your children and even think about it for yourself.
Have you accepted Jesus as your Savior?

 imagesHUX1EF3E


Comments Off on Holy Week- Jesus and Wii?   Posted In:     |    Written By: Kara Durbin
read more>>  

Easter: 4 Fun Hide & Seek Scripture Eggs Ideas!

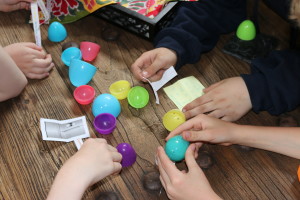
Kids young and old enjoy a good hunt, so why not multi-purpose those plastic Easter eggs and incorporate Scripture!  Here are variety of ideas that can be geared up or down depending on the age or ability of your child(ren):

Fill eggs with…

Picture Clue
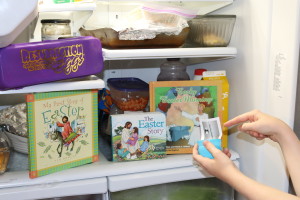
Fill eggs with nothing, except for one egg that has a picture of something or somewhere in your home.  For example, the picture could be a Googled image of a refrigerator.  When the child finds the egg with the picture, it’s the clue to where you’ve hidden an Easter Bible story book or the Bible with the Easter passage marked to read aloud.  Scroll down for the “copy and paste” fridge picture, ready for your use.

IMG_0582


Bible Verse Words

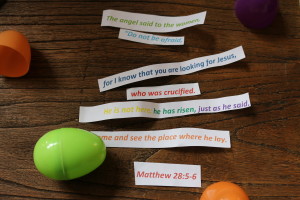
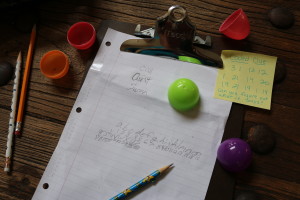
Fill eggs with words from a verse and help them assemble the Scripture after they find the eggs.  Scroll down for the “copy and paste” version, ready for your use.  

verse eggs

Bible Story Sentences
Fill eggs with sentences from the Easter story and help them order the story and read it after finding the eggs. 

Coded Number Clue
Fill eggs with nothing, except for a coded number clue in one egg.  Use a simple code (such as each number corresponding with a letter in the alphabet (A=1, B=2, etc) and write the letters of a number of someone they can call or text (enlist a friend or other extended family member for this) for the next clue.  You’ll have previously instructed that person to text back a Bible verse address.  Then, the kids can look up the verse(s), read what it says, and the family can discuss it.  

Our clue was translated to “Call Aunt Susan!”  I had texted her ahead to tell them “Luke 24.”

code eggs

  
These ideas could actually be used any time of year with any Scripture or Bible Story!  

Look through your copy of Parenting with Scripture: A Topical Guide for Teachable Moments
for more topical verses to play with!

Feel free to cut and paste these for your own egg hunt:

The angel said to the women,

“Do not be afraid,

for I know that you are looking for Jesus,

who was crucified.

He is not here; he has risen, just as he said.

Come and see the place where he lay.

Matthew 28:5-6

 Happy Scripture Hunting! 

eggs


Comments Off on Easter: 4 Fun Hide & Seek Scripture Eggs Ideas!   Posted In:     |    Written By: Kara Durbin
read more>>  

Resurrection Rolls

Resurrection Rolls

This fun recipe uses crescent rolls and a disappearing marshmallow to help your child understand the death and resurrection of Jesus Christ.

~Preheat Oven to 350 degrees

Ingredients:

Crescent rolls

Melted butter

Large marshmallows

Cinnamon

Sugar

Directions:

Give each child a triangle of crescent rolls. The crescent roll represents the cloth that Jesus was wrapped in.

Read Matthew 27:57-61

Give each child a marshmallow. This represents Jesus.

Have him/her dip the marshmallow in melted butter. This represents the oils that were put on Jesus’ body.

Now dip the buttered marshmallow in the cinnamon and sugar which represents the spices used to anoint the body.

Then wrap up the coated marshmallow tightly in the crescent roll (not like a typical crescent roll up, but bring the sides up and seal the marshmallow inside.) This represents the wrapping of Jesus’ body after death in cloth.

Place in a 350 degree oven for 10-12 minutes. (The oven represents the tomb – pretend like it was three days!  You could set a kitchen timer for three minutes and pretend each minute is a day.)

Let the rolls cool slightly. The children can open their rolls (cloth) and discover that Jesus is no longer there, HE IS RISEN!!!! (The marshmallow melts and the crescent roll is puffed up, but empty.)

Now read Matthew 28:5-8

Explain: At the tomb, Mary Magdalene and the other Mary saw an angel, who told them not to be afraid. No one had taken Jesus’ body, but He Had risen from the dead! The angel told the women to go and tell the disciples what they had seen, that Jesus had risen from the dead! They were so excited, they ran all the way to tell the disciples the Good News! He is risen from the dead!  Alleluia!

Spring '10 365[1]


Comments Off on Resurrection Rolls   Posted In:     |    Written By: admin
read more>>  

Resurrection Eggs

Can you believe that Easter is just a month from today?!
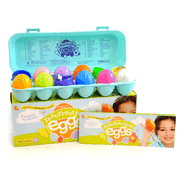
One of my favorite resources for this time of year is Resurrection Eggs.

Spice up your family or children’s devotional times by incorporating these through a variety of methods throughout the month –
*Open one a day and tell that portion of the Easter Bible Story.
*Hide the egg you are focusing on that day and let your child go on a hunt for it before discussing the contents.
*Once your child is familiar with the eggs and story, let him tell the story through the eggs.
*Let him hide the eggs for you to find before doing a review.

Resurrection Eggs, Updated Edition  -


Comments Off on Resurrection Eggs   Posted In:     |    Written By: admin
read more>>  

Want weekly tips on Parenting with Scripture?

Enter your email address to follow this blog and
receive notifications of new posts by email.