Helpful Resource & Big Change

Hello, dear readers!

I am writing to let you know about a . . .


Helpful Resource:
All 232 of my posts are categorized on the bar to the right side of the blog page.
I hope you’ll keep this in mind as you look for ideas and helps with parenting through Scripture.
Maybe take a scroll through and familiarize yourself with the variety of topics.

Big Change
Some of you may have noticed that I’ve been tapering off the frequency of posting.  There are a couple of reasons.

The major reason is that we are full fledged into the teenage world at my house and I don’t feel it’s appropriate to air our current teachable moments on social media.  I want my kids to know that my motives for parenting them are sincere, not just for another blog post.  And, I don’t want them to worry that what they are going through will be available for all the world to see.

The second reason is that between the book and the blog, I’m plum out of new ideas…especially since I don’t feel it’s appropriate to write about my current parenting.

Because of this season, I’m not sure how often (or ever?) I will be posting in the future.
But, I couldn’t leave with out a BIG….

THANK YOU for reading my blogs, buying my book, and recommending my book and blog to others!  Please continue to do so!  You are an integral part of helping spread the blessing of ideas for parenting with Scripture to other families!  I am ever grateful for you and pray that our Heavenly Father will bless all our efforts in parenting through His Powerful Word to reach the hearts of our children through our daily lives (Deut. 6:6-7).  To God be the Glory!

With love,
Kara

Monday 1 January, 2018  |  Copyright ©2018, Kara Durbin read more>>
 
Leave a comment (or read previous comments)
This post currently has no responses.
 

When Christmas lyrics hit real life = Teachable Moment

You may think my 2 favorite Christmas songs are a bit odd… 
I have one silly one, and one serious one.

Silly:
“Mamacita donde esta Santa Claus”
YouTube link.  You’re welcome.

So much about this song cracks me up, but my favorite is singing along with the background singers.
And, it makes me want TX MX food…which we pretty much live on here in Texas anyway!  YUM!

Side story – We were visiting friends in Florida  (NY natives) a few years ago and she said, “What are those things called again that you buy instead of bread?”  Um, that would be tortillas.  We’ve laughed about that ever since.

Serious: 
“God Bless Ye Merry Gentlemen” – Traditional

While I’m sure this doesn’t make everyone’s top 10, it holds a special place in my heart.

I was dreading the first Christmas without my Mom.  It just wouldn’t be the same without that precious lady that all of us intensely adored and who had the magic of making the holidays sparkle even brighter.

But God gave me a beautiful refrain to latch on to…

“Comfort and Joy”

When it first started rolling through my brain, I had to stop and think which Christmas carol it even came from.
This gift from God helped me through that first Christmas and has been a blessing ever since.

We may say that “God is good, all the time.  All the time, God is good.”  But nothing proves that more solidly than suffering.  He IS our comfort AND joy.  What a beautiful pairing of words!

Teachable Moment:
Do you have favorite Christmas songs, silly and serious?
Are you like me and realizing you haven’t taken the time to tell you children why the serious one is special to you?

Let’s take a moment this Christmas to enjoy a family dinner or drive-time conversation about everyone’s favorite Christmas carols.  Maybe it’s not hugely emotional like mine, but rather fun memories associated with it….or even just the tune.

Talk about what Biblical truths shine through your favorite carols.  Discuss how God works through carols lyrics in our hearts and can also be a light to others.  Take time to pray for the those who don’t know Him to hear the carols in a new light this year. May the truths sink into all of our hearts and souls.


One of my dearest friends made this banner.
It warms my heart and soul every time I pull it out with my Christmas decorations.

For more teachable moments, refer to Parenting with Scripture: A Topical Guide for Teachable Moments.
*Comfort and Joy are two of the topics in there…God gives us lots of great verses on those!  😉

Monday 4 December, 2017  |  Copyright ©2017, Kara Durbin read more>>
 
Leave a comment (or read previous comments)
This post currently has no responses.
 

Thankful Turkey: How-to with free templates!

Thankful Turkey is an
easy and meaningful Thanksgiving tradition.


Here’s the How-to:


Supplies: 
Big pumpkin
Wooden skewers (from the grocery store…bbq skewers)
tape
pens or markers
cardstock or construction paper – autumn colors
Printer


Directions:
1. Print this template* on red cardstock and then cut out head and feet. 


*copyright The Education Center, used by permission, www.themailbox.com
For personal use only.

2. Print this template on one of each color of the autumn toned cardstock.  Cut as many feathers as you think you will need.  It doesn’t hurt to print and cut extra and then they will be on hand for next year.


3. Tape the head and feet to the front of the pumpkin.  See picture for placement.

4. Have everyone write something they are thankful for on a feather (and sign and date on the back side for a keepsake).

5. Tape the back of the feather to the upper portion of the skewer.  Make sure the pointy end is facing down.

6. Poke each skewer  in the back side of the pumpkin, placing them so it looks like a fan of feathers across the back.  If you zig zag the placement forward and back, it will give the turkey more dimension.

7. Display the Thankful Turkey where everyone can see it and enjoy thanking God for the things mentioned on the feathers.  You might want to write this verse to keep beside the turkey.


8. When Thanksgiving is over, keep the feathers, head, feet, and verse and store safely for next year.

Future years:
Each year your pile of feathers will grow.  We keep them in a pile on the table next to the current year’s turkey and love looking through them and remembering.

Enjoy your Thankful Turkey!  Gobble, Gobble!

For more ideas and verses on the topic of Thankfulness, see your copy of Parenting with Scripture: A Topical Guide for Teachable Moments.


Thursday 2 November, 2017  |  Copyright ©2017, Kara Durbin read more>>
 
Leave a comment (or read previous comments)
This post currently has no responses.
 

How do my children view growing old?

How do my children view growing old?

Do I want them to have a negative/denial perspective?
“I’m 29!” says the 50-60 year old woman for whom the birthday isn’t exactly happy.

Or, do I want them to have a positive outlook on aging?
“I’m not getting old, just older!” says my 83 year old dad.

For kids, getting older is fun!  It means parties, cake, presents, and privileges. However, it’s helpful for me to remember that they will grow older some day and they are watching my example of how I treat aging.

I want to treat each birthday as a celebration of another year gifted with life and gained wisdom!  I want that day to be a celebration of what’s positive about growing older, not negative.  I want to continue using each year God blesses me with to live my days for His glory!  That’s what I want my kids to see!

A couple of amazing godly women helped shape my positive view of aging, so I know first hand how powerful living examples can be…

My Great Aunt Christine became homebound in her 80s and decided that since she couldn’t get out, she’d bless others from her home.  She picked up the church directory and before she got half way through, she had enough women who wanted to join her in weekly Bible readings and discussion at her house.

This is a picture of Aunt Chris during that time span, holding baby Kalli.

growingolder

My mom, who despite significant health decline her last year of life and barely being able to breathe because of her rare lung disease, was determined to keep teaching 3rd grade Sunday School and serving weekly at the local food shelter, among other things.  She wasn’t about to sit and rock away her days.  She was going to give life all she had until she simply couldn’t anymore…and by golly, she did!

Here’s Mom, showing she’s not too old to have some preschool fun on the floor with her newest grandchild!

dsc01948

This is a tough picture for me to see because this was during the year of her decline.  She already wasn’t feeling well, but she wasn’t about to let the chance pass to crawl into Kalli’s bed and share her nightly devotional time. 

IMG_1081

 Those were the positive examples, however….
Sadly, I also had people in my life who lived completely the opposite way in terms of attitude toward aging and gusto for life in later years.  Are they as memorable?  Are they people I would want to be like?  Did others want to be around them?  Unfortunately, no.

When I turned 40 a couple of years ago, we had a great drive time family discussion and impromptu Bible study on what God has to say about aging. 

The righteous will flourish like a palm tree,
    they will grow like a cedar of Lebanon;
planted in the house of the Lord,
    they will flourish in the courts of our God.
They will still bear fruit in old age,
    they will stay fresh and green,
proclaiming, “The Lord is upright;
    he is my Rock, and there is no wickedness in him.”
Psalm 92:12-15

The glory of young men is their strength, gray hair the splendor of the old. 
Proverbs 20:29

Therefore we do not lose heart. Though outwardly we are wasting away, yet inwardly we are being renewed day by day.
2 Corinthians 4:16

Thank you, Lord,
for each year you give us on this earth.
Though we long for our eternal home,
may we head into each new year with the perspective of it being a gift from You.
May we continue being a light to others and
may we give back to You as we seek to glorify You in all we do.
Amen

Make your own Teachable Moment:
On your birthday this year, consider making a teachable moment with your family.  Enjoy thinking about the people your family knows that have aged the way you want to emulate and what it is you appreciate about them.

As I write this, it’s occurring to me that none of those things have to do with outward beauty.  Our society is so caught up in looking young and beautiful no matter the age or cost.  But when I stop to think about the older people I admire, it has nothing to do with external.  I find them beautiful because of their heart.  What a rich birthday dinner discussion this could be!

HAPPY BIRTHDAY, to you, whenever yours happens to be! 
I’m thankful for you, dear reader!  🙂

For more teachable moments, refer to your copy of Parenting with Scripture: A Topical Guide for Teachable Moments.

Monday 2 October, 2017  |  Copyright ©2017, Kara Durbin read more>>
 
Leave a comment (or read previous comments)
This post currently has no responses.
 

“We aren’t going to church anymore!”

Surprise your kids by saying “We aren’t going to church anymore!” and enjoy the teachable moment you’ve created using the following thoughts as a guide through the ensuing discussion.

If they need prompting, ask them why they think the wording doesn’t make sense when we say, “Let’s go to church.” 

I bet some of them can figure it out!

Be with Church


“Let’s go BE WITH the church!” 

Our pastor pointed out this subtle difference in wording one Sunday morning and it made me stop and think. 

Old habits die hard, so I’m not sure I’ll completely transition to this.  However, I do appreciate the better distinguishing of “go be with” rather than “go to.”

Now you are the body of Christ, and each one of you is a part of it.”  1 Corinthians 12:27

We are actually the church wherever we go!

For more on talking with your child about this subject, see my blog titled, “How to Teach: The Church is the PEOPLE and can be anywhere!”

Teachable Moments can happen any time and any where.  Remember to keep handy your copy of Parenting with Scripture: A Topical Guide for Teachable Moments.


Monday 4 September, 2017  |  Copyright ©2017, Kara Durbin read more>>
 
Leave a comment (or read previous comments)
This post currently has no responses.
 

Generational Sayings- My Mom Said it…Now I am!

“Whoa, did that just come out of my mouth?!  I sound like my Mom!”
Can you identify?  Sometimes that can be good or bad!

Thankfully, I had an AMAZING mom who had lots of nuggets of wisdom!
I’m grateful for the ones that stuck and am excited to share them with you.
Scroll through this link to read about these sayings and feel free to adopt the ones you like…I certainly have!

  • “Adapt”
  • “Blame it on me!”
  • “If you can’t sleep, just rest.”
  • “Just smile and be nice.”
  • “We don’t hate, we strongly dislike.”
  • “You’re too pretty to…”

What generational sayings do you find coming out of your mouth?
If you think of any that are blessings to you, be sure to thank your mom this Mother’s Day!

If you didn’t have the privilege of a mom saying things you would want to repeat, remember that you are a new generation!  You have a chance to start fresh with your kids!  Don’t look back and regret…look forward and be the change!

She speaks with wisdom, and faithful instruction is on her tongue.
Proverbs 31: 26

Yup, that’s my beautiful Momma and me in 1975.  She had  when she was 41 and my siblings were 16 and 13!  With kids close to those ages now, I can’t imagine starting over.  She always said I kept her young.  😉


pws-book-ad1

Monday 1 May, 2017  |  Copyright ©2017, Kara Durbin read more>>
 
Leave a comment (or read previous comments)
This post currently has no responses.
 

Resurrection Cake for Easter!

The minute I saw this link on Pinterest, I knew that I wanted to make it for our family’s Easter gathering.  I followed that link’s basic plan, but wanted to share my own tip and tweaks.  My 11 year old son, Jake, and I had fun making and assembling this the night before Easter.
IMG_1527
Supplies/Ingredients:
-8 C batter bowl (mine is Pampered Chef brand)
-Platter (about 12 inches) or cardboard cake round
-2 craft/popsicle sticks
-Chocolate cake mix
-Chocolate frosting (ours had mini-chocolate chips in it and we decided we liked the bumpy/rocky look of it)
-7 oz shredded sweetened coconut (or half a 14 oz bag)
-Green food coloring (optional, if you don’t toast the coconut)
-3-5 Oreos (or substitute crumbled cake…will explain below)
-white bandage or small strip of white cloth…even white copy paper or tissue paper could work

Instructions:
(Some of you may be able to look at the picture and intuitively know how to make this happen.  For those of you who like details, here ya’ go!)

Cave
-Pre-heat the oven per your cake mix instructions.
-Grease and flour 8 cup batter bowl all the way up to the top since the cake will rise.
IMG_1511
-Make cake batter per recipe and pour into prepared batter bowl.
-Ours needed baking for 1 hour at 350 degrees to get it cooked all the way through.  This is quite a bit longer than the box mix calls for.  After the 40 minute mark, keep an eye on yours to see how it’s doing.  Insert a knife through the middle to check for doneness.
-Once baked, allow to cool before removing.  Run a knife down between the cake and the bowl to loosen it before inverting the bowl to get the cake on to the cooling rack.
-When the cake is cool, slice off the puffy part so that it will make a flat bottom for the cave.  ***Reserve the portion you cut off!
-Set the cake on the back half of the platter with the larger flat side down.  Carve out an opening in the front (see pictures).  Make sure you don’t go too close to the top or the roof will collapse.  ***Reserve the portion you cut out!!!
-Ice the cake, reserving a dollop of the frosting for making the stone.

Walkway
Make the walkway in front of the tomb (see completed pic) by smashing Oreo cookies in a ziplock or crumbling a small portion of the reserved cake.
FullSizeRender

Stone
Make the big stone by crumbling the remaining reserved cake and mushing it by hand with the reserved icing.  (Fun, but messy part for kids!)  The consistency will be soft, but it needs to be firmly packed so that it will hold together.  Wrap this in plastic wrap or wax paper and put in the freezer for about an hour so that it can firm up.
IMG_1512

Grass or terrain
There are a couple of options for this.  Shake the coconut in a ziplock with a few drops of green food coloring (see above pic).  Or, toast the coconut for a more natural, earth toned, terrain.  Spread around the cake and walkway.

Cross
I thought about real twigs, but that ooged out the germ freak in me.  So, we hot glued together 1 jumbo craft stick and 1 regular craft stick.  Make sure to put the cross beam high enough to account for part of the vertical beam being in the cake.
IMG_1517

Burial cloth
Lay whatever you are using to represent this inside the hole in the cave tomb.  We used this guaze, but any small strip of white cloth (got an old t-shirt?), tissue, or tissue paper would work.
FullSizeRender (1)
While it’s baking or while everyone is enjoying munching on your creation, consider reading the Resurrection Story from the Bible, Matthew 28:1-10.  This is a great way to create a teachable moment out of a fun, hands-on family project for a most important holiday!

For more teachable moment ideas, use Parenting with Scripture: A Topical Idea for Teachable Moments.


Monday 3 April, 2017  |  Copyright ©2017, Kara Durbin read more>>
 
Leave a comment (or read previous comments)
This post currently has no responses.
 

Resurrection Garden How-to for Easter Season

I’ve seen many different versions of Resurrection Gardens through the years and had always wanted to make one.  Being a Type A person, I finally put it on my calendar for the following February to make sure we remembered to not let another year pass.  With my kids getting older, I’m realizing more and more how few years left we have to do such things together!

We had 3 other kids staying with us the weekend we did the project.  So, I can say that this was a doable and fun project for 4 years old through 8th grade!  I browsed through Pinterest at the variety of Resurrection Gardens to find my favorite design and followed the basic steps here.  However, I’d like to share my tips and tweaks of how we got our finished product.
IMG_1562

We divided the process over a couple of days as we had time and so it wouldn’t be overwhelming.

Garden Center
First, we headed out to the Garden Center to gather these supplies:
-shallow, wide container (we went with plastic so it wouldn’t be heavy)
-potting soil
-3 plants for whatever lighting will work for where you are keeping the garden.  The kids enjoyed making the selections.
-moss (I actually had the fake version from the craft store on hand.)
-twine (Or use any string your have on hand for putting the cross together. Hot glue is another option.)
-small pot to use as tomb.  You can buy a clay one like I used.  But, I actually recommend using one of the round containers that the plants you purchase for this come in.   Here’s why…After a couple of weeks, the pot started growing something white.
IMG_1541

Sticks and Stones Hunt
We have a city park/greenbelt behind our house and had a fun time foraging there for…
*1 large stone…needs to be approximately the size of the opening of the pot you are using for the tomb
*Several small stones…to use as a walkway, simply for added interest
*3 long sticks…make sure you account for the fact that part of them will be submerged in the soil.
*3 shorter sticks…for the cross bar

Assembling
*Spread out all your supplies in your work space.  The temperature was nice outside, but a bit drizzly so we worked on our covered patio.
*Scoop dirt out of the potting soil bag to fill your large, shallow pot.
IMG_1256
*Before taking the plants out of their pots, arrange everything as you wish the scene to look.
*Plant the plants.
*Cover the top of the tomb and any exposed dirt with the moss.
*Wipe any loose dirt out of the tomb and off the walkway rocks.
*Use the twine or string to put the cross bar on the cross.  Remember to put the cross bar high enough to account for the bottom part of the cross being stuck in the dirt.  To attach the cross bar, simply wrap the twine around several times diagonally both ways and then tie it off in the back.  Little hands will need help with this.
*Put a bandage or tissue in the tomb for the effect of the burial cloth.
IMG_1270
Once it’s completed, set the creation in the middle of the kitchen table (before moving it to its final destination) and enjoy a snack around it while reading the Resurrection story from Matthew 28:1-10.

Looking for more teachable moments?  Check out my book, Parenting with Scripture: A Topical Guide for Teachable Moments. 

resurrectiongarden

Thursday 2 March, 2017  |  Copyright ©2017, Kara Durbin read more>>
 
Leave a comment (or read previous comments)
This post currently has no responses.
 

How to grow your own butterflies to teach that Jesus brings new life!

Ever since my kids did this in their Kindergarten class, I’ve been itching to do it at home.  Last year, with a tween and a teen, I decided it was now or never!  Though they are probably too cool to admit it, we all enjoyed the process.   Click on the picture to order the same kit we used.  Inside is a voucher for ordering the caterpillars.

cat-butterfly

I’m posting this now in case you want to do this as a Lenten learning activity with your family.  Lent begins on March 1 this year.  You still have time to order this and have it wrapped up and ready to surprise them.  Or, you could save it for an Easter present as we did.  If you plan to wrap it up, make sure you order the box that does NOT have the live caterpillars included.  (Note:  I noticed some cheaper options as I was linking the product, but they all seem to ship immediately WITH the live caterpillars.)

IMG_1510

(…and this is why I need to remember to NOT buy wrapping paper with white background.
I had to double wrap it awkwardly with the leftover paper to keep it being see-through!)

I will only show the start and finish, so you can discover the other phases on your own.  It truly is a way to worship God through miracles of just one of His many creations!

caterpillars

butterflies

For those of you with little bitties (and really any age!), simply use this home project as a springboard for talking a God, the creator, and how amazing He is!

For those with kiddos old enough to think more abstractly, the analogy of the caterpillar to butterfly is a creative way to talk about the idea of Salvation.

Therefore, if anyone is in Christ, he is a new creation;
old things have passed away; behold, all things have become new.
2 Corinthians 5:17

As Salvation is foundational for our Christian beliefs, I devoted 4 pages to it in my book rather than 2 pages as with the other 100 topics.   Reference pages 190-193 of Parenting with Scripture: A Topical Guide for Teachable Moments  for related Scriptures and more ideas on how to talk with your children about Salvation.

butterfliewnewlife

Monday 6 February, 2017  |  Copyright ©2017, Kara Durbin read more>>
 
Leave a comment (or read previous comments)
This post currently has no responses.
 

How to give the gift of responsibility, year by year!

This is the easiest, rubber meets the road way I’ve seen to build responsibility in children that I’ve come across.  The idea is that on birthdays from ages 11-18, you give your child a freedom/responsibility in the form of a gift.  Read on for “How it works,” as well as “How it’s worked for my family.”

responsibilitybox

How it works: (as explained to the pre-teen/teen)
(Click to download this explanation.)

Each year, you will receive a freedom in the form of a responsibility. If you handle it wisely, then you will be on track to receive the next gift from the responsibility box on your birthday. If you are not responsible with your freedom, then it may be revoked for a time and/or you may not be ready to receive your next gift. Remember that these are privileges that you earn, not rights.

His master replied, ‘Well done, good and faithful servant! You have been faithful with a few things; I
will put you in charge of many things. Come and share your master’s happiness!’
Matthew 25:23

The Responsibility Box is a reminder that

  • We know you want to be independent and we are giving you these steps to help you reach that.
  • We want to help prepare you to leave home.
  • We are on your side.
  • We are rooting for you!responsibilityboxboxes

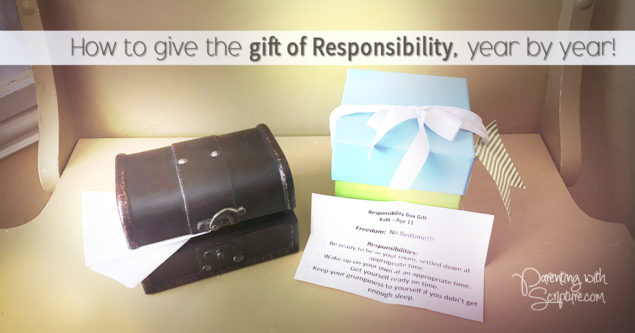
This visual depicts how the responsibility grows as the child ages.
Ultimately, the child will be out of the home…and out of the box,
having been given the tools to make good choices
in handling the freedoms and responsibilities of being an adult.

TIP:  If your child is older when you begin this plan, you can make the box with 6 month increments instead of 1 year

Sample Gift Wording – 

Freedom: No Bedtime!!!

Responsibilities:
Be ready to be in your room, settled down at appropriate time.
Wake up on your own at an appropriate time.
Get yourself ready on time.
Keep your grumpiness to yourself if you didn’t get enough sleep.

rbox

Other “Gift” ideas:
babysitting, staying home alone, bedtime, waking up, feeding pets, choosing clothing, getting a phone, mowing, pumping gas, driving, homework, curfew, shaving legs, managing own laundry, etc.

Things to consider when picking the “gifts”:

  • What issues cause the most friction in my relationship with my child?
  • Is there a way to give him “ownership” of something within family parameters?
  • What are some small “gifts” (pumping gas) that will help build toward bigger “gifts” (driving a car).
  • What is my child ready for according to his maturity?
  • What should my child be able to do for himself at this age, but may need incentive to grow?
  • What do I want for him to be able to handle for himself when he leaves home and how can I map out these “gifts” through the years so that he can be successful?
  • “Lord, please give me Your wisdom for what my child needs?”

How has this worked for my family?
God’s timing is perfect, as always!
We were approaching my daughter’s 11th birthday when I went to a parenting class where the concept of the “Responsibility Box” was explained.

Our wonderful Associate Pastor, Jim Allen, and his lovely wife, Trish, had successfully used this approach with their children years ago and have been sharing it ever since.  To give full credit, Jim and Trish originally heard about it from an Christian speaker named, Ken Poure, in the 1960’s-70’s.  Jim built on Ken’s basic idea, including coming up with the helpful visual of the nesting boxes shown above.  I’ve tweaked it further to meet the needs of our family.

It resonated with me when Jim and Trish pointed out that often, the things that cause the most conflict are the areas where the child is needing to stretch his own wings and take on responsibility.

It’s a WIN-WIN! 
Child gets freedom in the form of a responsibility.
Parents get peace and can quit badgering!

Such has been the case in every single instance since we started this 3 years ago.
For example, our sweet Kalli is every bit as much of a night owl as Tim and I are.  Bedtimes were always a challenge.  I can’t tell you the relief it was to let that rest in her court!  We all agreed that she needed to be in her room at an appropriate time, but it was up to her when she actually went to bed.   FREEDOM FOR ALL!

When responsibility kicks in…painfully
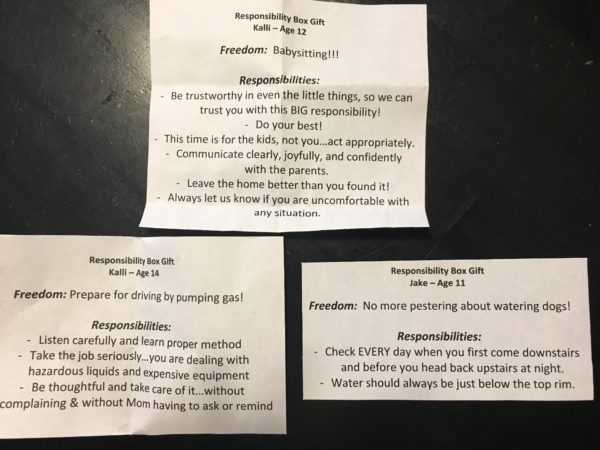
Then came the year that she got babysitting as a freedom.  She had worked hard, taking the online Red Cross babysitting class and making business cards in preparation for turning 12 and being able to officially sit.  She could hardly wait and already knew this would be one of the freedoms in her Responsibility Box on her birthday.

However, pretty much as soon as she had her birthday, she lost this freedom.  Why?  I will protect her and not share the details.  However,  it related to #1 item under the responsibilities associated with the freedom of babysitting.  “Be trustworthy in even the little things so we can trust you with this BIG responsibility.”  You may note that this echoes the Biblical principle of Matthew 25:23, on which the Responsibility Box is founded.

Therefore, it was no surprise to her that she lost the freedom.  And, the beautiful thing was that it wasn’t a battle.   It was indeed disappointing, embarrassing, and painful for her to have to tell people she couldn’t currently sit when she was asked (we let her simply say she was grounded so she didn’t have to go into it).  But, it helped her really digest that if she couldn’t be trusted with little things at home, it wasn’t at all appropriate for her to be trusted with other people’s children!

As with many growth experiences, I’m thankful she went through this because now I know she’s that much more trustworthy as a result of this trial. 

When the responsibility kicks in…positively
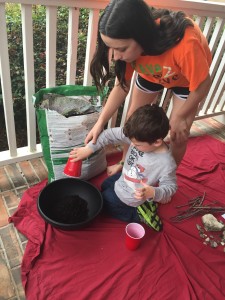
After watching his older sister gain freedoms for a couple of years, our son, Jake, couldn’t wait until he turned 11 so he could get his own Responsibility Box.  However, as every parent knows, each kid is different!  Tim and I struggled and prayed to find things that he would be excited about but were at a level that he could handle.  We had to get quite creative.  We knew that he was so eager to have great responsibilities and freedoms but didn’t have the maturity yet.  How could we help get him there?

We took a look at what we had to pester him most about…one of them being watering the dogs.   Hmmmm….how could we turn that responsibilities into a freedom?  Well, we figured he didn’t care to be badgered anymore than we cared to be badgering him!  So, we went heavy on discussing with him about how know he was ready to show us the independent dude he could be.  We knew this “empowering” kind of talk would appeal to his desire to be a “man”…and sure enough, it worked!

This boy, who previously had to be reminded every. single. day to water the dogs, was now taking initiative to do it on his own!  (Insert lots of positive praise reinforcement from parental units here!)

The Responsibility Box has over and over proven to help us back off and help him step up! 

I hope this idea blesses you as much as it has blessed our family! 
Happy Parenting!
Kara

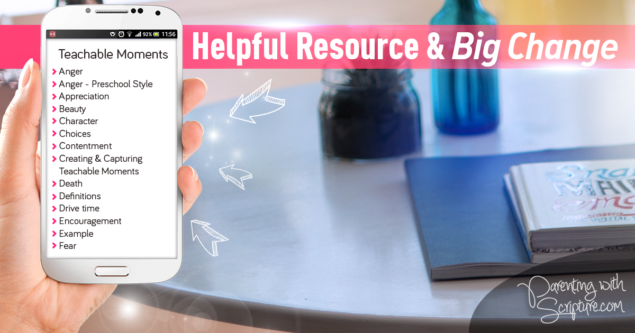
For more help with Christian parenting, check out Parenting with Scripture: A Topical Guide for Teachable Moments. 


Monday 2 January, 2017  |  Copyright ©2017, Kara Durbin read more>>
 
Leave a comment (or read previous comments)
This post currently has no responses.
 

Want weekly tips on Parenting with Scripture?

Enter your email address to follow this blog and
receive notifications of new posts by email.