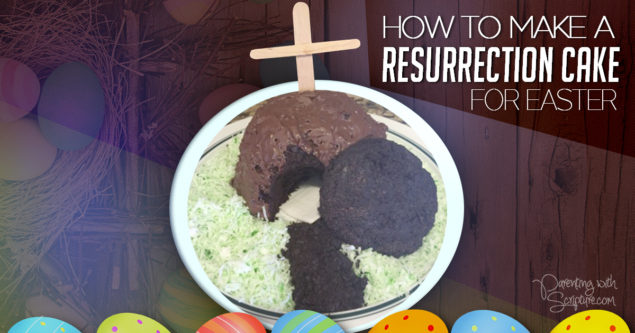
Resurrection Cake for Easter!
The minute I saw this link on Pinterest, I knew that I wanted to make it for our family’s Easter gathering. I followed that link’s basic plan, but wanted to share my own tip and tweaks. My 11 year old son, Jake, and I had fun making and assembling this the night before Easter.
Supplies/Ingredients:
-8 C batter bowl (mine is Pampered Chef brand)
-Platter (about 12 inches) or cardboard cake round
-2 craft/popsicle sticks
-Chocolate cake mix
-Chocolate frosting (ours had mini-chocolate chips in it and we decided we liked the bumpy/rocky look of it)
-7 oz shredded sweetened coconut (or half a 14 oz bag)
-Green food coloring (optional, if you don’t toast the coconut)
-3-5 Oreos (or substitute crumbled cake…will explain below)
-white bandage or small strip of white cloth…even white copy paper or tissue paper could work
Instructions:
(Some of you may be able to look at the picture and intuitively know how to make this happen. For those of you who like details, here ya’ go!)
Cave
-Pre-heat the oven per your cake mix instructions.
-Grease and flour 8 cup batter bowl all the way up to the top since the cake will rise.
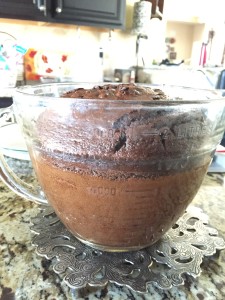
-Make cake batter per recipe and pour into prepared batter bowl.
-Ours needed baking for 1 hour at 350 degrees to get it cooked all the way through. This is quite a bit longer than the box mix calls for. After the 40 minute mark, keep an eye on yours to see how it’s doing. Insert a knife through the middle to check for doneness.
-Once baked, allow to cool before removing. Run a knife down between the cake and the bowl to loosen it before inverting the bowl to get the cake on to the cooling rack.
-When the cake is cool, slice off the puffy part so that it will make a flat bottom for the cave. ***Reserve the portion you cut off!
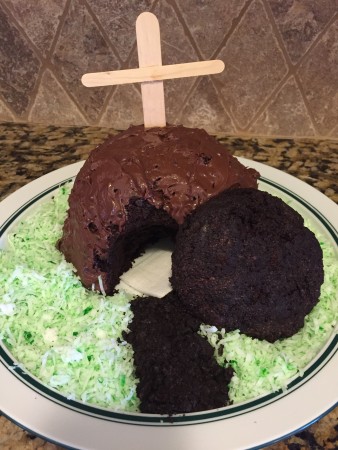
-Set the cake on the back half of the platter with the larger flat side down. Carve out an opening in the front (see pictures). Make sure you don’t go too close to the top or the roof will collapse. ***Reserve the portion you cut out!!!
-Ice the cake, reserving a dollop of the frosting for making the stone.
Walkway
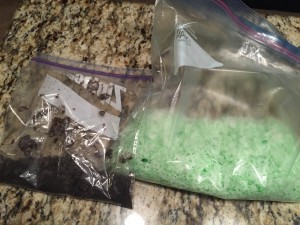
Make the walkway in front of the tomb (see completed pic) by smashing Oreo cookies in a ziplock or crumbling a small portion of the reserved cake.
Stone
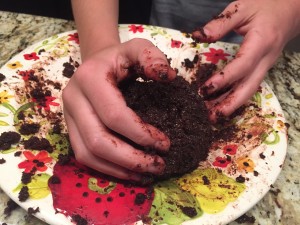
Make the big stone by crumbling the remaining reserved cake and mushing it by hand with the reserved icing. (Fun, but messy part for kids!) The consistency will be soft, but it needs to be firmly packed so that it will hold together. Wrap this in plastic wrap or wax paper and put in the freezer for about an hour so that it can firm up.
Grass or terrain
There are a couple of options for this. Shake the coconut in a ziplock with a few drops of green food coloring (see above pic). Or, toast the coconut for a more natural, earth toned, terrain. Spread around the cake and walkway.
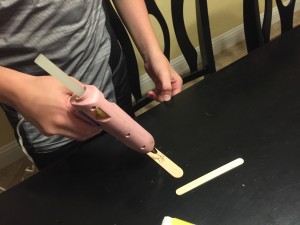
Cross
I thought about real twigs, but that ooged out the germ freak in me. So, we hot glued together 1 jumbo craft stick and 1 regular craft stick. Make sure to put the cross beam high enough to account for part of the vertical beam being in the cake.
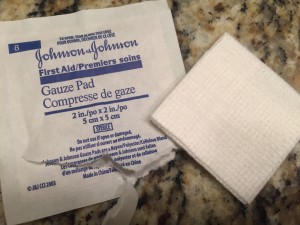
Burial cloth
Lay whatever you are using to represent this inside the hole in the cave tomb. We used this guaze, but any small strip of white cloth (got an old t-shirt?), tissue, or tissue paper would work.
While it’s baking or while everyone is enjoying munching on your creation, consider reading the Resurrection Story from the Bible, Matthew 28:1-10. This is a great way to create a teachable moment out of a fun, hands-on family project for a most important holiday!
For more teachable moment ideas, use Parenting with Scripture: A Topical Idea for Teachable Moments.
|
read more>> |